Use the multimeter R×1K block, and connect the red and black test leads to the two leads of the self-flashing diode alternately. When one of the measurements is found, the needle first swings to the right for a certain distance, and then the needle begins to shake (oscillate) slightly at this position, with an amplitude of about one small grid. This phenomenon shows that the integrated circuit inside the self-flashing diode begins to oscillate under the action of the 1.5V battery voltage inside the multimeter, and the output pulse current causes the pointer to shake, but the LED cannot emit light because the voltage is too low. Այնուամենայնիվ, this phenomenon shows that the connection method of the red and black test leads of the multimeter is correct, that is, the black test lead of the multimeter is connected to the positive pole of the self-flashing diode.Note: When judging the positive and negative poles of the self-flashing diode, do not think that the black test lead is connected to the positive pole of the diode in the measurement with a small resistance, as in the case of measuring ordinary diodes.
What about the positive and negative poles of the light-emitting diode? In fact, it is also very simple. For light-emitting diodes, the longer leg is positive and the shorter leg is negative. If the legs are the same length, the larger one in the light-emitting diode is the negative pole, and the smaller one is the positive pole. In the multimeter: the red test lead is connected to “+”, the black test lead is connected to “-“; when measuring the light-emitting diode, the low resistance range cannot be measured. You can use the RX10K range to measure. The two test leads touch the two poles of the diode. If the resistance is small, the black test lead is connected to the positive pole. If the resistance is large, the black test lead is connected to the negative pole. When the light-emitting diode is connected to the TTL component, a 470Ω voltage drop resistor is generally required to be connected in series to prevent damage to the device.
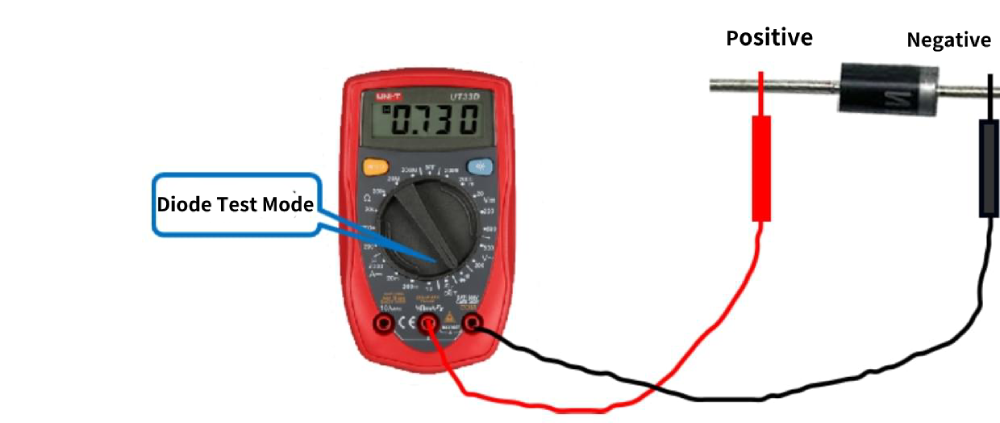
How to quickly distinguish the positive and negative poles of the light-emitting diode? In fact, it is also very simple. The long leg of the light-emitting diode is positive and the short leg is negative. If the legs are the same length, the larger one in the light-emitting diode is the negative pole, and the smaller one is the positive pole. In the multimeter: the red test lead is connected to “+”, the black test lead is connected to “-“; when measuring the light-emitting diode, the low resistance range cannot be measured. You can use the RX10K range to measure. The two test leads touch the two poles of the diode. If the resistance is small, the black test lead is connected to the positive pole. If the resistance is large, the black test lead is connected to the negative pole. When a light-emitting diode is used in connection with a TTL component, a 470Ω drop resistor is generally required to be connected in series to prevent damage to the device.
Method of using a multimeter to determine the positive and negative poles of a self-flashing diode:
Use the multimeter R×1K block, and connect the red and black test leads to the two leads of the self-flashing diode alternately. When one of the measurements is found, the needle first swings to the right for a certain distance, and then the needle begins to shake (vibrate) slightly at this position, with a swing amplitude of about one small grid. This phenomenon shows that the integrated circuit inside the self-flashing diode begins to oscillate under the action of the 1.5V battery voltage inside the multimeter, and the output pulse current causes the pointer to shake, but the voltage is too low to make the light-emitting diode emit light. Այնուամենայնիվ, this phenomenon shows that the connection method of the red and black test leads of the multimeter is correct, that is, the black test lead of the multimeter is connected to the positive pole of the self-flashing diode.